When temperatures drop, your RV needs special care to stay protected through the winter months. Cold weather, freezing water lines, and long stretches of storage can all cause damage if you’re not prepared. Winterizing your RV isn’t just a good idea—it’s essential for preventing costly repairs and keeping your home on wheels ready for spring adventures.
At Poulsbo RV, we want to help you understand the steps, products, and best practices that go into proper RV winterization. Whether you plan to store your RV for the season or camp through the cold, this guide will help you protect your investment.
Why Winterizing Your RV Matters
Skipping winterization or doing it incorrectly can lead to serious issues once temperatures fall below freezing:
- Cracked water lines or fittings
- Broken faucets and valves
- Damaged water heater tanks
- Burst pipes from expanding ice
- Mold and mildew buildup during long-term storage
- Battery failure or power issues
A little time now can save you thousands in repairs later.
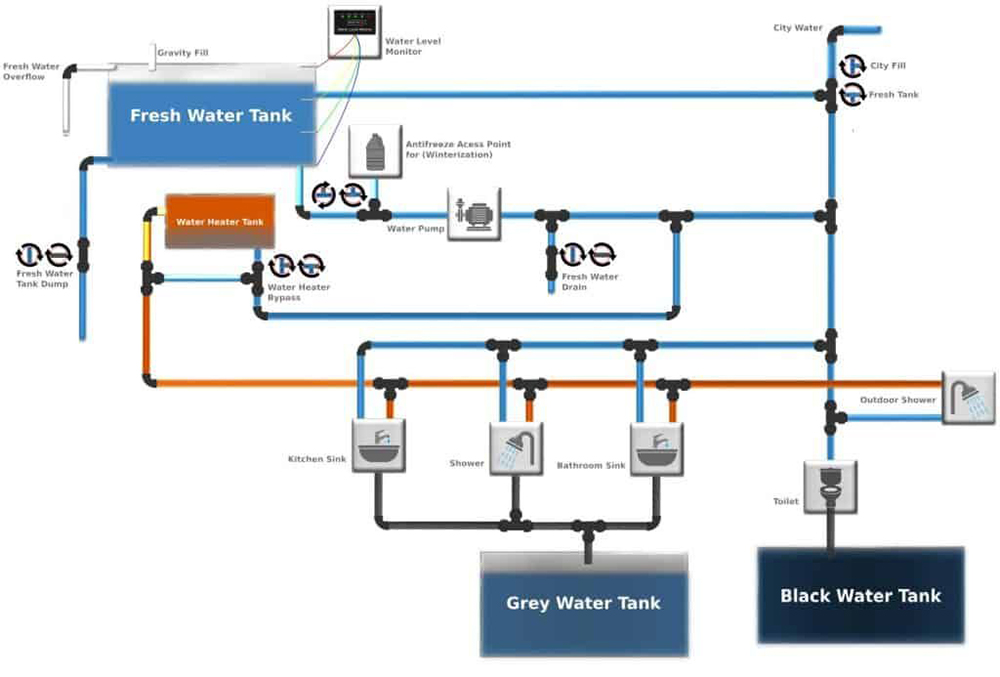
Step 1: Drain and Bypass Your Water Systems
Proper winterization always starts with removing all water from your RV’s plumbing.
Drain the Fresh Water Tank
Empty your fresh water tank completely to prevent freezing and bacteria growth.
Open Low-Point Drains
Most RVs have hot and cold low-point drains. Open them and let the water fully drain.
Drain the Water Heater
Never add antifreeze to your water heater. Instead:
- Turn off all power to the water heater
- Open the drain plug or anode rod
- Allow the tank to empty completely
Bypass the Water Heater
Most RVs have a built-in bypass valve. This prevents you from filling the water heater with antifreeze, saving you time and money.
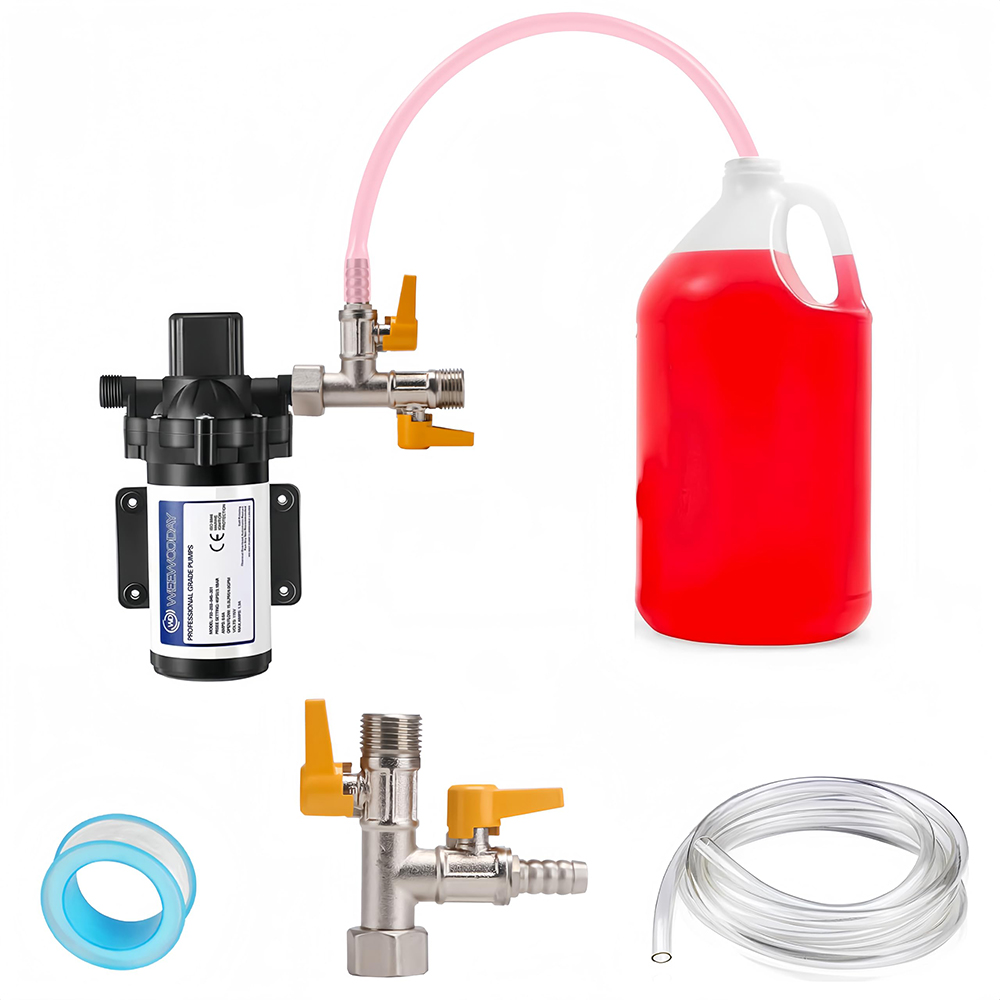
Step 2: Add RV Antifreeze to Your Plumbing System
Using RV (non-toxic) antifreeze is the safest way to protect your pipes from freezing.
Using the Water Pump Winterizing Kit
Many RVs come with a siphon tube for your water pump:
- Place the tube into a jug of RV antifreeze
- Turn on the pump
- Open each faucet one at a time (hot and cold)
- Wait until pink antifreeze comes out of each fixture
Make sure to run antifreeze through:
- Kitchen and bathroom sinks
- Shower and outdoor shower
- Toilet
- Low-point drains
- Washer/dryer prep (if equipped)
Don’t Forget the Drains Pour a cup of antifreeze down every sink, shower, and toilet drain to protect the P-traps.

Step 3: Prep the Exterior for Winter Storage
Freezing weather isn’t the only thing that can damage your RV during winter. Moisture, debris, and temperature swings all take a toll.
Clean and Inspect Roof & Seals
- Look for cracks in sealant
- Clear off debris
- Consider spot resealing if needed
Protect Your Slide-Outs
- Clean slide toppers
- Lubricate slide seals
- Make sure everything is fully retracted and dry before storing
Cover or Treat Tires
Tires break down faster in cold, wet weather. Protect them by:
- Using tire covers
- Parking on wood or pads instead of bare ground
- Checking PSI before storage
Step 4: Prepare the Interior
Winter can create humidity issues inside your RV. A few simple steps help prevent mold, odors, and pests.
Deep Clean Before Storing
Food crumbs and spills attract rodents and insects.
Remove All Food Items
Even shelf-stable goods can attract wildlife.
Prop Open Cabinets and Doors
Improves airflow and reduces moisture.
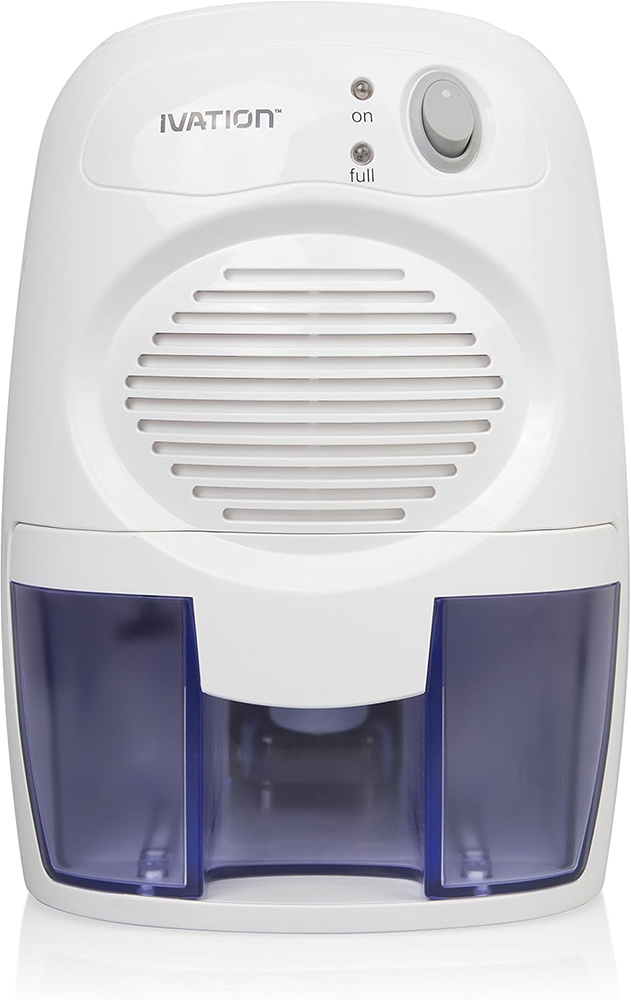
Use Moisture Absorbers
Products like DampRid help control humidity through the season (available in our parts department).
Step 5: Protect Your Batteries
A dead or damaged battery is one of the most common off-season problems.
Disconnect Your Batteries
If storing your RV:
- Remove the batteries
- Store in a cool, dry place
- Charge monthly
For motorhomes, consider using a trickle charger to maintain them during winter.
Step 6: Winterize Your Generator (If Equipped)
Generators require their own care:
- Change the oil
- Run fuel stabilizer through the system
- Check air filters
This keeps everything ready for next season.
When to Call the Experts
RV winterization can be straightforward, but every RV is a little different. If you’re unsure about any step—especially plumbing, slide maintenance, or seal inspections—it’s best to let a professional handle it.
Poulsbo RV offers:
- Full winterization service
- Water system inspections
- Seal and roof evaluations
- Tire checks and replacements
- Battery testing and storage solutions
Our parts departments also carry RV antifreeze, water heater bypass kits, moisture absorbers, tire covers, and everything else you need to do the job correctly.
Final Thoughts
Winterizing your RV is one of the most important steps you can take to protect your investment. With the right tools and habits, your RV will stay safe through the coldest months and be ready to go when adventure calls again.
Stop by any Poulsbo RV location for winterization supplies, service support, or expert advice. We’re here to keep your RV protected, comfortable, and road-ready all year long.
